Monday, May 30, 2011

Man Card

 Thank you for stopping in.
Hope you like what you find and will come back again soon.

I see that Blogger is really having problems. I am very sorry but I cannot seem to post a comment on any other blogs and I cannot see any of my very important to me followers of my blog. I hope this gets resolved soon.

The card I did this morning is for a challenge layout at The Sweetest Thing. When I studied the layout I thought ok Fathers Day is coming soon soooo I better try something for that... BUT this could be used for a birthday or other occasion for a guy too. I will also add this to Make It Monday and see how they like it.

It ended up being monochromatic as I went along. I used SU Always Artichoke and River Rock card stock and Always Artichoke ink. The mat was embossed with my SU Lattice embossing folder. The old fashion car is one I love from SU Thoughts of Father that I borrowed from my granddaughters stash she keeps here. I wish I had of bought it as it is great for man cards.

Well on to my card..... let me know what you think. I love to see your comments.


Challenge:
The Sweetest Thing
Make It Monday

Sunday, May 29, 2011

Really clean and simple!

So glad you stopped in to see what I am doing.
I hope you like what you see and will come back again. 

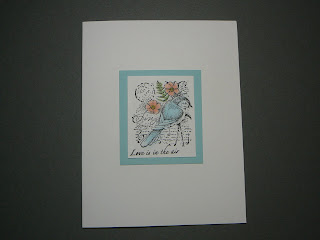
Well last night I posted a card that I called "How Simple Can it Get" into a challenge but found out it wasn't following the guidelines. I felt bad about it so I did this one that is following the rules.

This really is a simple card and took under 5 minutes to do.

The stamp set is an old SU called Garden Collage. I coloured the flowers BUT I just swished some chalk onto the bird....simple, simple, simple.

Here it is ....hope you like it. If not have a look around my blog, I am sure there will be some you do like.

Challenge:
Simply Less is More

Saturday, May 28, 2011

How simple can it get?

So glad you dropped in to see what I am doing.
I hope you like what you see and will come back again. 

This took a total of 5 minutes to put together. Now how much more simple can it be?

The stamp set is Su Easter Blossoms, card stock is SU Going Grey, ink Black.

I was going to colour the flowers but decided that it looked nice as a grey and white card. Simple but elegant.

Hope you like it.
Carolyn

Challenges:
Sketch Frenzey Friday
Simply Less is More

Bicycle girl

So glad you stopped by to see what I am doing.
I hope you like what you see and will come back again.

I am really getting challenged with colours that I wouldn't think about putting together. It really makes you think.

This time I used SU Real Red, Daffodil Delight, So Saffron and Kraft (now called Crumb Cake).
I didn't have any Daffodil Delight card stock sooo I stamped the background with Daffodil Delight ink. I also used 4 red brads in the corners to balance out the red.

I would love to hear what you think of this, your comments mean a lot to me.
Carolyn

Click to enlarge and see true colours.


Challenges:

Friday, May 27, 2011

A simple card for my grandson

 So glad you stopped in to see what I am doing.
I hope you like what you see and will come back again.

I have all kinds of girly cards for my granddaughter to pick from for when she goes to a birthday party but not many for my grandson sooo I decided I would try and do one for him.

I seem to have a hard time making guy cards, even little guy cards but here is my attempt.

I used SU Baja Breeze, Soft Suede and Crumb Cake. I embossed both the Baja Breeze and Crumb Cake with the SU Lattice embossing folder which is my all time favorite of embossing folders.

Here is what I came up with.


Challenges

Wednesday, May 25, 2011

Clean And Simple Pansy-Just Because I Care

So glad you stopped by to see what I am doing.
I hope you like what you see and will come back again.

This is a very quick clean and simple card that could be used for any occasion.

I used SU Elegant Eggplant for the card base. I cut a piece of white 3-1/2  X 4-3/4 inches for the mat. The pansy stamp is an old SU set called Flowers of Gratitude and the sentiment  is SU Best Yet. The lattice was punched from  SU Always Artichoke.

There isn't much else to say about this card so I will just show you the photo now. Sorry about the shadows .... I had to take the photo at night and my flash isn't working.

Hope you like it and will come back again.


Challenges:

Creating a grid background

 So glad you stopped by to see what I am doing today.
I hope you like what you see and will come back again.

I pulled this card out of my stash and thought maybe some of you that are newer to card making may not know how to do this. We tend to forget that there are always new people starting.

You can use a scoring board or your cutter, if you change the cutting blade to a scoring blade. In a pinch you can just remove the cutting blade and use a credit card to do the scoring if you don't have a scoring blade. I am using my score board today.

I cut a piece of white 4  X  5-1/4 then line up one of the corners at the 6 in mark. BE SURE to run your nail or the score tool down the line so your bottom corner lines up in the correct line. Now starting at the 6 inch mark, score it there, then simply score every 1/2 inch on both sides of it.


Next you will turn it to the very next corner, setting this corner at the 6 inch mark again and scoring there, then every 1/2 inch on both sides again. This is what it will look like.


Now I have done many different things with this background but for this card I just left it as it is.

I cut a strip 1-1/2 inch  X  5-1/4 inch from a piece that I had stamped with a background stamp using Old Olive ink to match the card base of Old Olive.

The small mat is Old Olive cut 2-1/2  X 4 inches and the white is cut 2-1/4  X  3-3/4 inches then stamped with SU Asian Artistry and then I used my SU Ticket punch on the corners.

I hope you like it and will try one for yourself. It makes a clean and simple card.

Carolyn

Grey & White Simple Card

It's been a couple of days since I have posted. Sorry about that but I have been spring cleaning again. I shampooed the dinning room rug yesterday and today I plan to do the hallways sooo the card I made this morning is a quick and simple one.

I used white and grey for simplicity. I stamped the grey mat with a floral background using grey ink. I just wanted to add a little to the background without overpowering it.

I punched out 4 SU Large Tags then cut the top of the tag off and then I used the corner punch on 3 of the corners. I left the 4th corner for the center so it would be easy to line up accurately.

The rest is pretty basic but if you have any questions feel free to email.

Thanks so much for coming to peek in. I hope you like what I have posted so far and will keep coming back once in awhile.

Carolyn


Challenges:

Saturday, May 21, 2011

Victorian Lady

Today I am asking you all for some help, PLEASE.

I am posting 2 different views of a card I made and I need help deciding which one you think is the nicest layout. I have 10 cut out, stamped and ready to put together but am torn between which layout to use.

If you would kindly just take a moment to post a comment and vote for the one you like the best, it would be greatly appreciated.
Card #1
or
Card #2
I used Creamy Carmel for the card base and Chocolate Chip for the dark colour. The patterned mat is a background stamp using Creamy Caramel. I also sponged the edges of both the stamped mat and the stamped lady with Creamy Caramel.

Thanks for your help
Carolyn

Entered at GAB 16 challenge and Make it Monday 38

Friday, May 20, 2011

Violets

I finished this card and am so pleased with it. I know it is very clean and simple but sometimes those make the most elegant ones.

I am finding that I have to keep my mojo juices flowing so I can have something to post everyday. This is really keeping me on my toes.

OK on to the card......The card was made using Crushed Concord, Blushing Bride and Pear Pizza.  I embossed the Blushing Bride with the Vintage Wallpaper.

I was wondering what I would come up with but once you start cutting and moving the colours around it goes pretty quickly. Hope you like it.

Carolyn


 I am entering this at Create Ink colour challenge and Stamping Bs   
and also Make it Monday39

Thursday, May 19, 2011

Do you Doodle?

Well if you like to doodle when you are on the phone or just sitting talking to someone then this technique is for you. I never sit and doodle but I found it easy and fun to do.

I saw cards using this technique called Zentangle being offered at a store and thought "I can likely do this" so I went home and played around. This is my FIRST attempt after finding this info about how to Zentangle  HERE on the web. There is much more out there.... just do a search in google.

PLEASE NOTE!
 I am not claiming that I know what I am doing here..... I just thought this is something all you doodlers might like to try..... I managed to do it soooo I am sure you can too. Just play around for some fun.

OK I will attempt to show you how I did mine. I started with a white square 2 & 1/2  X 2 & 1/2. I just drew some curves to map out an area to doodle within. I tried to recreate the one I did on my card so I could show you a few steps soooo this is not going to look exactly like the finished one.  You can sketch any type of area for yours.

I used a very fine tip Avery black marker.


Next I just started to doodle. I found these little shell shapes an easy one to try first.


Just keep going until this section is full, then try something in the next one. You will see lots of patterns at the site I linked to above. Don't be scared.... just try something.


Now you will notice that this time mine came out looking more like squares because I didn't curve the lines like it did on my card. Now look at my first attempt at this.


I really hope that you will take a few moments to try this fun technique. It looks very complicated but it isn't.
Carolyn

Wednesday, May 18, 2011

Hello Friend

I found this card kind of challenging to do. I had to use colours I don't usually use but I am really pleased with the way it turned out.

The card base is white and the blue mats are Pacific Point. I also used the SU button die to cut out the 3 buttons then I coated them with Crystal Effects to give then a shine like buttons.

It would be nice to have you to click join and follow me.


I am entering this in the following challenges:
Craft Your Passion
Die Cut Dreams
There She Goes
Color Throw Down

Lattice and flower-3 looks

Well today is ANOTHER day of rain and fog...... when do we get spring??? This is getting depressing and I just don't seem to be able to get much done.

I decided to do this card with So Saffron as the card base to try to brighten my day. I then cut the lattice to fit the frame. Found a cute flower stamp that says "smile".  I tied some green ribbon around it but when I looked it was just too plain. This is it so far.


Now I  embossed a white piece and sponged it with So Saffron,  then used the 5 petal punch to punch it out, added a button and some leaves. OK not too bad but it could still use something.


I added a little bit of sponging around the edge using So Saffron ink as I just wanted a hint of colour. Then I added 3 dots of brown to the bottom to balance it off.


Now I think this looks better so I will enter it in the challenge at Stamping Vacation , A Spoonful Of Sugar, Delightful Challenges and Get Hippity with Ippity.
Let me know what you think. I love an input that you give.

Carolyn

Tuesday, May 17, 2011

Double crimping and inking

Hi all my blogging friends and followers. It looks like more rain today..... when will it stop? Well if I can't work in the gardens it means that I can work on cards. LOL

The card I have for you today uses a technique that I am sure a lot of you have seen before but there are always new stampers appearing on the scene that may like to know how this was done.

I will start with the piece for the mat that I used the crimper on. All I did was run it through the crimper then I swiped the ink pad across it to colour just the raised edges.


I then turned the piece so that I could crimp it again from the side, thus creating another ridge that will form the little squares that make it look like seersucker.
I took my ink pad and swiped it across these ridges too so now you should be able to see a nice pattern of little squares like this. That is it..... very simple and I think this makes a nice mat for the card I did.
Now for the finished card..... I used Certainly Celery for the card base. For the next layer I cut a piece of vellum 4  X  5 & 1/4 then embossed it with dots. This just gives this layer a soft look with little white dots showing from the embossing.

Next I crimped a piece of white 3  X 4 & 1/4. The reason I did this piece BEFORE cutting the black mat is that when you crimp a piece it will make it shrink in so by doing this first you can then figure out the size of mat you will need. My black needed to be cut at 3 & 1/8  X  4 & 3/8. You may have to adjust this measurement a little.

The small black mat was cut 2 & 3/8  X  3 & 5/8 then the white piece to stamp was cut 2 & 1/4  X  3 & 1/2.

The oval for the sentiment is the SU Fat oval punch then matted with black punched with the SU scalloped punch.

I used a couple of scraps of white ribbon for a little interest. I was pleased with how this card came along and hope you like it too.

Let me know what you think about this crimping technique.
Carolyn


I also posted this card on Make it Monday. Sew Many, One Stitch At A Time, Penny's Paper Crafting,and Crafty Creations.

Monday, May 16, 2011

We grow by dreams

Here is a simple card I made one night. There is really nothing to it. I used Chocolate Chip for the card base then used a background stamp that looks like marble using Chocolate Chip ink on a piece of white cut at 4  X  5 & 1/4.

I love brown and green together so I cut a piece of Mellow Moss 2 X 5 & 1/4 then a piece of Chocolate Chip 1 & 3/4 X 5 & 1/4 for on top of it.

The square Mellow Moss mat is cut at 2 & 3/4  X  2 & 3/4 then next mat is Chocolate Chip cut at 2 & 1/2  X  2 & 1/2. I stamped on a piece of white that was cut at 2 & 1/4  X  2 & 1/4.

The rectangle mat is Mellow Moss again, cut at  3 & 1/8  X 1 & 3/8 then another mat of Chocolate Chip cut at 2 & 7/8  X 1 & 2/8. Then the white to stamp on is cut at 2 & 3/4  X 1.

This is an easy layout that could be used with all kinds of different stamps for any type of card.
Here it is...... Hope you like it.

Friday, May 13, 2011

Monochromatic Just A Note

First, I would like to thank you ladies that have left me comments. It really inspires me to keep posting. Then I must tell you how pleased I am to see that I am gaining a few followers. Thank you so much for taking the time to click follow and then join me ..... I really appreciate it.

Now todays card is another quick one and pretty simple too. I used Lavender Lace for the card base then I cut a 4 x 4 white mat. The next mat was 3 & 3/4  X  3 & 3/4 using Lavender Lace again. Then I cut a piece of white 3 & 1/2  X  3 & 1/2 and stamped it with a basket weave.

The flower is an old SU set called Natural Beauty that I picked up at a garage sale. I stamped it on a piece cut at 2 & 7/8  x  1 & 1/2 then matted with Lavender Lace cut at 3 & 1/8  x 1 & 3/4.

Hope you like it.
Carolyn

Wednesday, May 11, 2011

Simple card with punched flowers

Today my granddaughter saw this card and said I should post it to the blog so here it is.

It was a very simple card to make ..... I used Soft Suede for the card base then cut a mat of Early Expresso. The next layer was Sahara Sand which I embossed  with a diamond pattern.

I then used the 5 petal punch and punched out 6 flowers from a piece of Sahara Sand and then I sponged the edges with Early Expresso. I stamped the center with a star burst stamp I had and then I inked up the end of a new unsharpened pencil and stamped the centers. I then curled the edges of all the petals before gluing them together. The little flower was punched using the SU punch that has 3 different blossoms and then I did the same as above to it.

The brown strip is a piece of satin ribbon but you could just use a strip of Early Expresso for it. I glued the flowers to the card then punched a piece of Sahara Sand using the Fat Oval and stamped the saying with Early Expresso and used pop dots to raise it up a little.

This card looks like I spent more time than I really did. I think it might have taken all of 15 minutes to complete.

Well that is it for today. Post a comment and let me know what you think .... or better yet why don't you JOIN me so you can follow along with what I am doing.

Supplies:
Cardstock- SU Soft Suede, Early Expresso, Sahara Sand
Ink- SU Early Expresso
Punches- SU 5 Petal, BoHo Blossoms (I think), Fat Oval
Stamp- Thoughts & Prayers

Tuesday, May 10, 2011

A Man Card

I don't know about you but I find it kind of hard to figure out a nice Man Card.  I hunted through some of the cards I had made and came across this one and thought it was kind of nice so I am sharing it with you today.

It was very simple to do and could be used for any occasion by changing the sentiment. I used a black card base then embossed a mat of chocolate chip using the lattice embossing folder. Found a scrap piece of pattern paper for the one side that seemed to go with the chocolate chip. Then using the SU Autumn Days stamp set I stamped the wheat twice and then the partridge with Chocolate Chip ink. I didn't have any brads so I just punched out the corners so the black mat would show through. Oh I also sponged across the bottom for the ground.

Let me know what you think about it..... I would love to get some comments from you.


Supplies
Cardstock: SU Black, Chocolate Chip
Embossing folder- SU Lattice
Stamps- SU Autumn Days

Sunday, May 8, 2011

Clean And Simple - Thinking of You

I'm getting there...... the smokey smell is leaving slowly but surely.

My daughter came up for the weekend and boy did she clean with me. She washed all the walls in the dinning room, hung the curtains that I had washed, washed all the things in the china cabinets and put them back. This was the BEST mothers day present I could have had.

I even got some time today to make a card for another challenge from a sketch over at clean and simple stamping.  I had a hard time not adding to this but it had to be clean and simple. I didn't have much time to play around with this but am glad to be getting back to where I can spend some time on my cards.

Here is what I came up with. I did a wash on the card stock then embossed and sanded it. I saw this done here and just loved the effect.


Supplies:
Cardstock- SU Mellow Moss
Embossing folder - SU Vintage Wallpaper
Raffia and button.
Related Posts Plugin for WordPress, Blogger...